GitHub Bot
10 minute read
Scenario
In this tutorial, we will build a GitHub Bot. The bot will monitor issues in a GitHub repository, with the following behavior:
- When a new issue is opened, it will automatically comment with a thank you message.
- When an issue is closed, it will automatically comment.
- When an open issue has not had a comment for x amount of time, it will add a
stalelabel to it. - When an open issue that is stale, is commented on, the
stalelabel should be removed. - When an issue is closed, it is not considered stale.
Tutorial Modes
You can follow along the steps below in a Github codespace, a VSCode Dev Container or your own Kubernetes environment.
The easiest way to follow along with this tutorial is to launch a Github Codespace using the link below. This will allow you to run the example application within your browser without setting up anything on your own machines.
![]()
This will open a page with some configuration options. Make sure that the Branch selected is main and set the Dev Container configuration to GitHub bot with Drasi.
To follow along with a Dev Container, you will need to install:
- Visual Studio Code
- Visual Studio Code Dev Containers extension
- docker
Next, clone the learning repo from Github, and open the repo in VS Code. Make sure that Docker daemon (or Docker Desktop) is running.
Once the solution is open in VS Code, follow these steps:
- Press Cmd + Shift + P (on MacOS) or Ctrl + Shift + P (Windows or Linux) to launch the command palette.
- Select
Dev Containers: Rebuild and Reopen in Container. - Select the
GitHub bot with Drasioption to launch this tutorial.
You need to have Docker Desktop on your local machine, or your own Kubernetes cluster.
For guidance on how to install Drasi for Docker:
To setup a local Kubernetes cluster and install Drasi on it, K3s and Kind are both good options:
Next, clone the learning repo from Github and open a terminal in the /tutorial/github-bot directory.
Prerequisites
To capture the change feed from GitHub, we will use the GitHub Webhooks functionality. These webhooks require a public Http endpoint to receive the changes. To solve this, we will setup a simple Azure Function that will forward the body of the incoming Http message to an EventHub message, and then we will use the EventHub source to connect it to Drasi.
For this tutorial, you will need an Azure account. The setup of the Function and EventHub has been packaged into an ARM template, that can be deployed using the button below:
After clicking this button, it should take you to the Azure portal to confirm the parameters for the deployment:
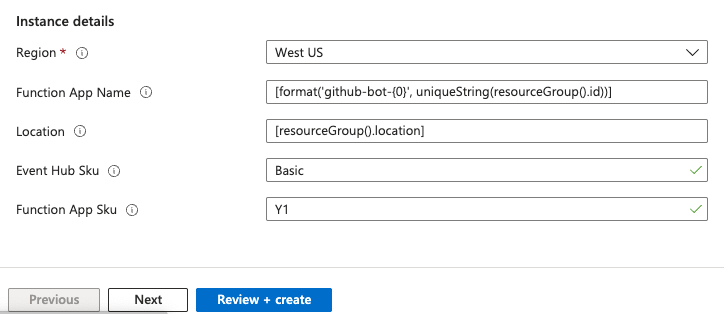
Click Review + create and wait a few minutes while the resources are deployed.
Once the deployment is complete, click on the Outputs tab which will provide you with the connection string for the EventHub and the URL of the Function.
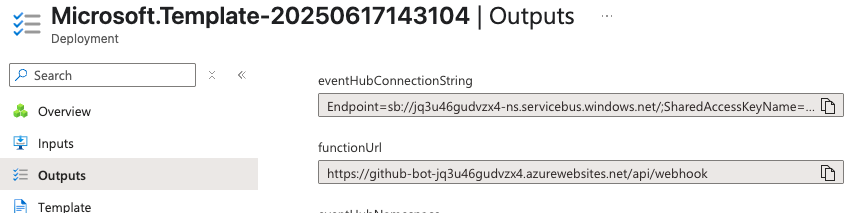
Copy these values to a notepad, as we will use the Function URL to setup the webhook in the GitHub portal and the EventHub connection string will be used to configure the Drasi source.
Configure the webhook
Navigate to GitHub and create a new private repository for the purpose of this tutorial.
Once you have created the repository, go to the Settings > Webhooks page, and create a new webhook.
Paste the Function URL into the Payload URL field.
Set the Content type to application/json.
For Which events would you like to trigger this webhook?, pick the Send me everything option.
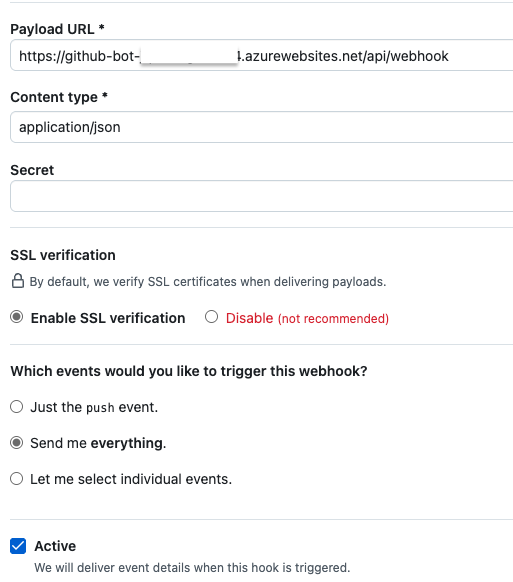
Click Add webhook, this will setup a webhook that will send events occurring in GitHub to the Http endpoint provided.
Deploy the source
Use the EventHub connection string from the outputs to configure a secret:
drasi secret set event-hub connection-string "<connection string>"
We will use the following source manifest to create a Drasi source that reads the EventHub we just created.
kind: Source
apiVersion: v1
name: github
spec:
  kind: EventHub
  properties:
    connectionString:
      kind: Secret
      name: event-hub
      key: connection-string
    eventHubs:
      - github
This can be deployed using the following command:
drasi apply -f source.yaml
drasi wait -f source.yaml
Deploy the open issues query
Next, we will create a continuous query that will monitor open issues. The basic structure of the message from GitHub will look as follows:
{
  "action": "opened",
  "issue": {
    "url": "https://api.github.com/repos/my-org/test-repo",
    "repository_url": "https://api.github.com/repos/my-org/test-repo",
    "id": 100,
    "number": 55,
    "title": "Issue title",
    "user": {
      "login": "xxxxxx",
      "id": 200,
      "type": "User"
    },
    "labels": [ ],
    "state": "open",
    "assignees": [ ],
    "body": "Issue body"
  },
  "repository": {
    "id": 300,
    "name": "test-repo",
    "full_name": "my-org/test-repo",
    "default_branch": "main"
  }
}
We will use the map middleware to map the incoming JSON document onto a graph node. The following query will emit added results when an issue is opened and deleted results when the issue is closed. All changes from the EventHub source will be reflected as an insert, with the label of the EventHub itself, in this case, it is github.
The middleware defined in this query:
- Extracts the
issueobject from the JSON document using:selector: $.issue - When an issue is opened:
- Checks condition:
$[?(@.event == 'issues' && @.action == 'opened')] - Applies an insert/update operation to create a graph node:
op: Update - Labels the node as
Issue:label: Issue - Uses the issue’s ID as the node ID: (
id: $['$selected'].id)
- Checks condition:
- When an issue is closed:
- Checks condition:
$[?(@.event == 'issues' && @.action == 'closed')] - Applies a delete operation to remove the graph node:
op: Delete
- Checks condition:
Click here to learn more about the Map middleware
After that, we have a Cypher query that just returns all the Issue nodes in the graph.
kind: ContinuousQuery
apiVersion: v1
name: open-issues
spec:
  mode: query
  sources:
    subscriptions:
      - id: github
        nodes:
          - sourceLabel: github
        pipeline:
          - extract
    middleware:
      - name: extract
        kind: map
        github:
          insert:
            - selector: $.issue
              condition: $[?(@.event == 'issues' && @.action == 'opened')]
              op: Update
              label: Issue
              id: $['$selected'].id
              properties:
                id: $['$selected'].id
                title: $['$selected'].title
                number: $['$selected'].number
                creator: $['$selected'].user.login
                repo: $.repository.full_name
            - selector: $.issue
              condition: $[?(@.event == 'issues' && @.action == 'closed')]
              op: Delete
              label: Issue
              id: $['$selected'].id

  query: |
    MATCH
      (i:Issue)
    RETURN
      i.id AS id,
      i.title AS title,
      i.repo AS repo,
      i.number AS issue_number,
      i.creator AS creator
This query already exists in the tutorial folder, so you can deploy it with the following command:
drasi apply -f query-open-issues.yaml
Create a GitHub Access Token
In order to invoke actions on GitHub, we will need to be authenticated. To do this we will use a personal access token. At this point, if you wish to create a dedicated GitHub account for your bot, you can do so.
Go to the Settings > Developer Settings > Personal access tokens > Fine-grained tokens page in your GitHub profile.
Click Generate new token
For repository access, ensure that it has explicit access to the repository that you created earlier.
For permissions, enable read and write access to Issues:

Click Generate token, and copy the PAT into the following command to create a secret:
drasi secret set github token "<GitHub PAT>"
Deploy the open issues reaction
We will use the Http reaction to invoke GitHub APIs when the query emits diffs to the result set. This reaction enables you to define the URL and body of the Http request using Handlebars templates, where the fields of the result can be accessed via the before and after objects.
In this case, when an issue is created, we will post a thank you comment. When it is closed, we will post a comment to say so.
For details on the GitHub API, please see the GitHub API documentation
kind: Reaction
apiVersion: v1
name: open-reaction
spec:
  kind: Http
  properties:
    baseUrl: "https://api.github.com"
    token:
      kind: Secret
      name: github
      key: token
  queries:
    open-issues: >
      added:
        url: "/repos/{{after.repo}}/issues/{{after.issue_number}}/comments"
        method: "POST"
        body: >
          {
            "body": "Hello! @{{after.creator}}, thank you for your contribution!!"
          }
      deleted:
        url: "/repos/{{before.repo}}/issues/{{before.issue_number}}/comments"
        method: "POST"
        body: >
          {
            "body": "This issue has now been closed."
          }
This reaction already exists in the tutorial folder, so you can deploy it with the following command:
drasi apply -f reaction-open-issues.yaml
Deploy the stale issues query
Next, we will create a continuous query that will monitor issues that have become stale. This query will track when issues haven’t received comments for a specified period of time.
The middleware defined in this query will extract both issue and comment objects from the JSON documents. For issue events, it will update the graph node with basic issue information including the creation time (createdAt). For comment events, it will update the same issue node with the timestamp of the last comment (lastCommentAt).
Here’s what the Cypher query is doing:
MATCH (i:Issue)- Finds all nodes labeled as “Issue” in the graph.WHERE i.state = 'open'- Filters for issues that are currently open.AND drasi.trueNowOrLater(...)- Evaluates if an issue has become stale.coalesce(i.lastCommentAt, i.createdAt)- Gets the timestamp of either the last comment or the issue creation (if no comments)datetime(...) + duration({ seconds: 15 })- Calculates the time when the issue becomes stale (15 seconds after last activity)<= datetime.realtime()- Checks if that stale time has been reached.datetime.realtime()returns the current timestamp.- The second parameter
datetime.transaction() + duration({ seconds: 15 })tells the system when to check again if the condition isn’t true yet.datetime.transaction()returns the timestamp of the change coming from the source. - The
drasi.trueNowOrLaterfunction ensures that the query result is updated at the moment when an issue becomes stale, even if no new events occur. Click here to learn more about this function
kind: ContinuousQuery
apiVersion: v1
name: stale-issues
spec:
  mode: query
  sources:
    subscriptions:
      - id: github
        nodes:
          - sourceLabel: github
        pipeline:
          - extract
    middleware:
      - name: extract
        kind: map
        github:
          insert:
            - selector: $.issue
              op: Update
              label: Issue
              id: $['$selected'].id
              properties:
                id: $['$selected'].id
                title: $['$selected'].title
                state: $['$selected'].state
                number: $['$selected'].number
                repo: $.repository.full_name
                createdAt: $['$selected'].created_at
            - selector: $.comment
              op: Update
              label: Issue
              id: $.issue.id
              properties:
                lastCommentAt: $['$selected'].created_at

  query: |
    MATCH
      (i:Issue)
    WHERE i.state = 'open'
    AND drasi.trueNowOrLater(
          (datetime(coalesce(i.lastCommentAt, i.createdAt)) + duration({ seconds: 15 })) <= datetime.realtime(),
          datetime.transaction() + duration({ seconds: 15 })
        )
    RETURN
      i.id AS id,
      i.title AS title,
      i.repo AS repo,
      i.number AS issue_number
This query already exists in the tutorial folder, so you can deploy it with the following command:
drasi apply -f query-stale-issues.yaml
Deploy the stale issues reaction
We will use the Http reaction to invoke GitHub APIs when the stale issues query emits diffs to the result set. This reaction will manage the stale label on GitHub issues based on their activity status.
When an issue becomes stale (appears in the query results), the reaction will add a stale label to the issue. When an issue is no longer stale (gets removed from the query results, typically due to new activity), the reaction will remove the stale label.
kind: Reaction
apiVersion: v1
name: stale-reaction
spec:
  kind: Http
  properties:
    baseUrl: "https://api.github.com"
    token:
      kind: Secret
      name: github
      key: token
  queries:
    stale-issues: >
      added:
        url: "/repos/{{after.repo}}/issues/{{after.issue_number}}/labels"
        method: "POST"
        body: >
          {
            "labels": ["stale"]
          }
      deleted:
        url: "/repos/{{before.repo}}/issues/{{before.issue_number}}/labels/stale"
        method: "DELETE"
This reaction already exists in the tutorial folder, so you can deploy it with the following command:
drasi apply -f reaction-stale-issues.yaml
Try it out
Go to your GitHub repo and create a new issue. You should see a thank message generated, and if you wait 15 seconds without adding a new comment, it will be labeled as stale.
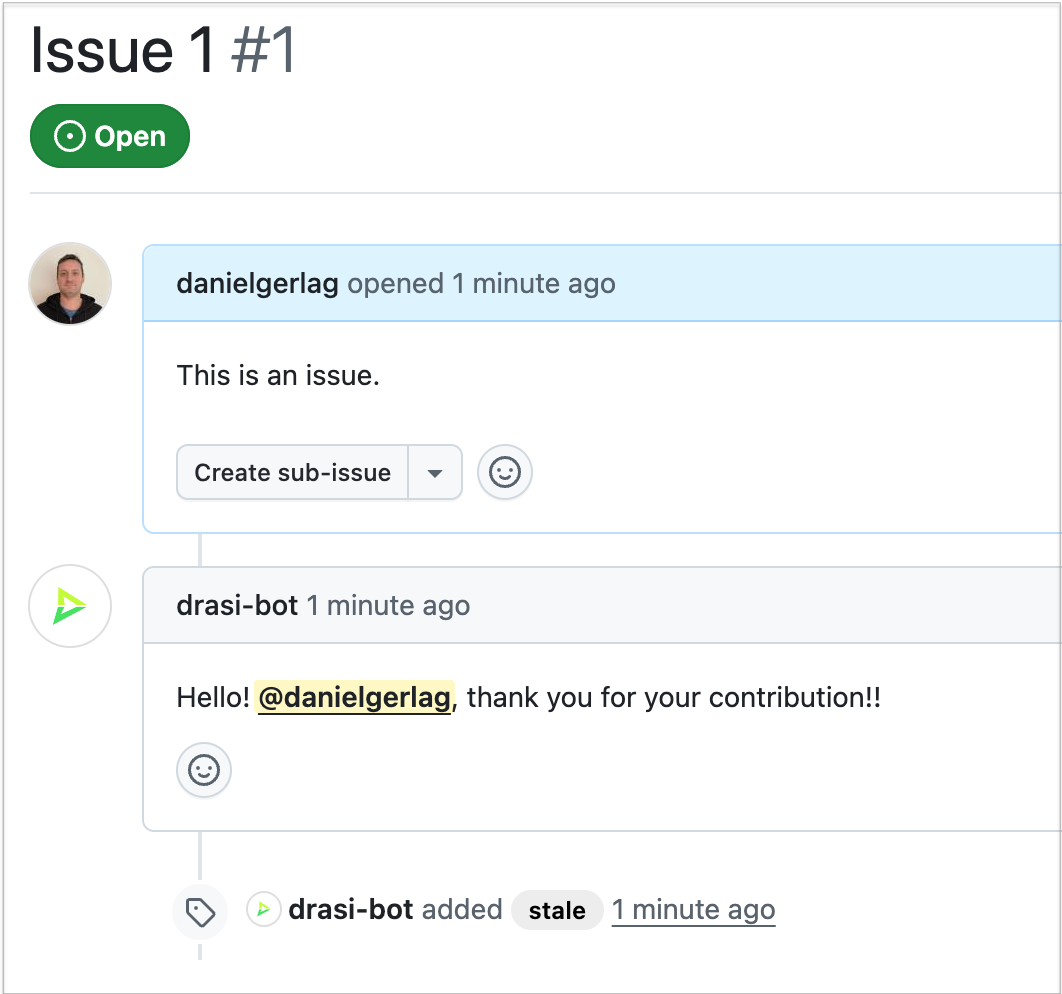
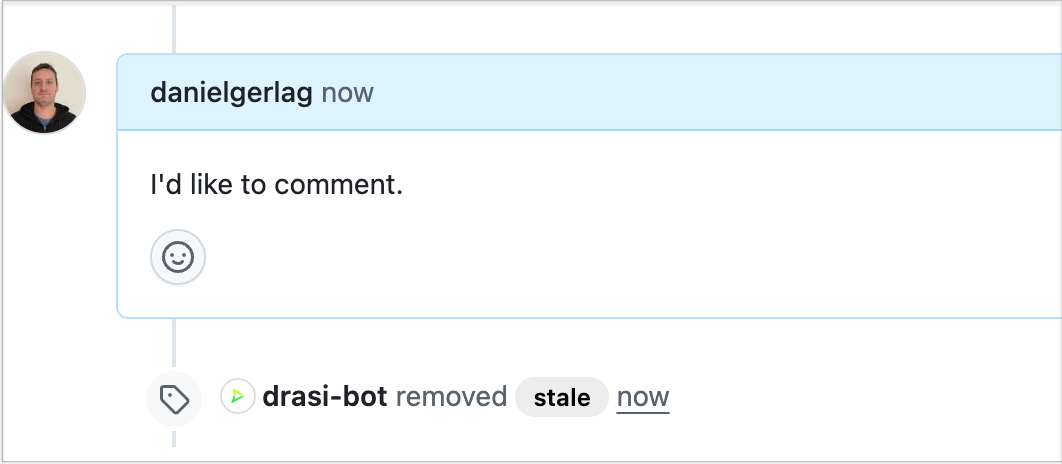
Now, add a comment to the issue and the stale label should be removed.
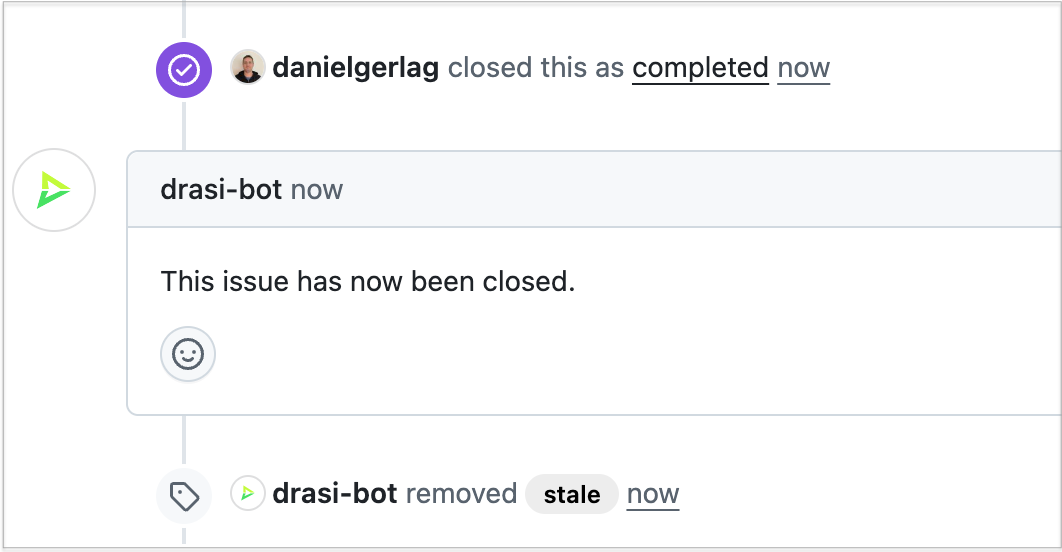
Now, close the issue and a comment will be automatically added stating that it has been closed. If it had a stale label, it will also be removed when the issue is closed because the WHERE i.state = 'open' clause in the query filters it out of the result set for the stale issues query.
Feedback
Was this page helpful?
Glad to hear it! Please tell us what you found helpful.
Sorry to hear that. Please tell us how we can improve.